Frequently Asked Questions
1. What is wax sealing in scrapbooking?
2. What are the benefits of using wax seals in scrapbooking?
3. What supplies do I need to start wax sealing in my scrapbook?
4. How do I properly make a wax seal?
5. Can I use wax seals in a leather notebook?
Scrapbooking is not just about preserving memories; it’s an art form that allows you to express your creativity and personal style. One trend gaining popularity among scrapbook enthusiasts is the use of wax sealing. Adding wax seals to your scrapbook can bring a unique touch, making every page a delightful showcase of artistry. In this post, we will explore how to incorporate wax sealing into your scrapbooking process effectively, along with why it’s a fantastic addition to your project that complements even a leather notebook.
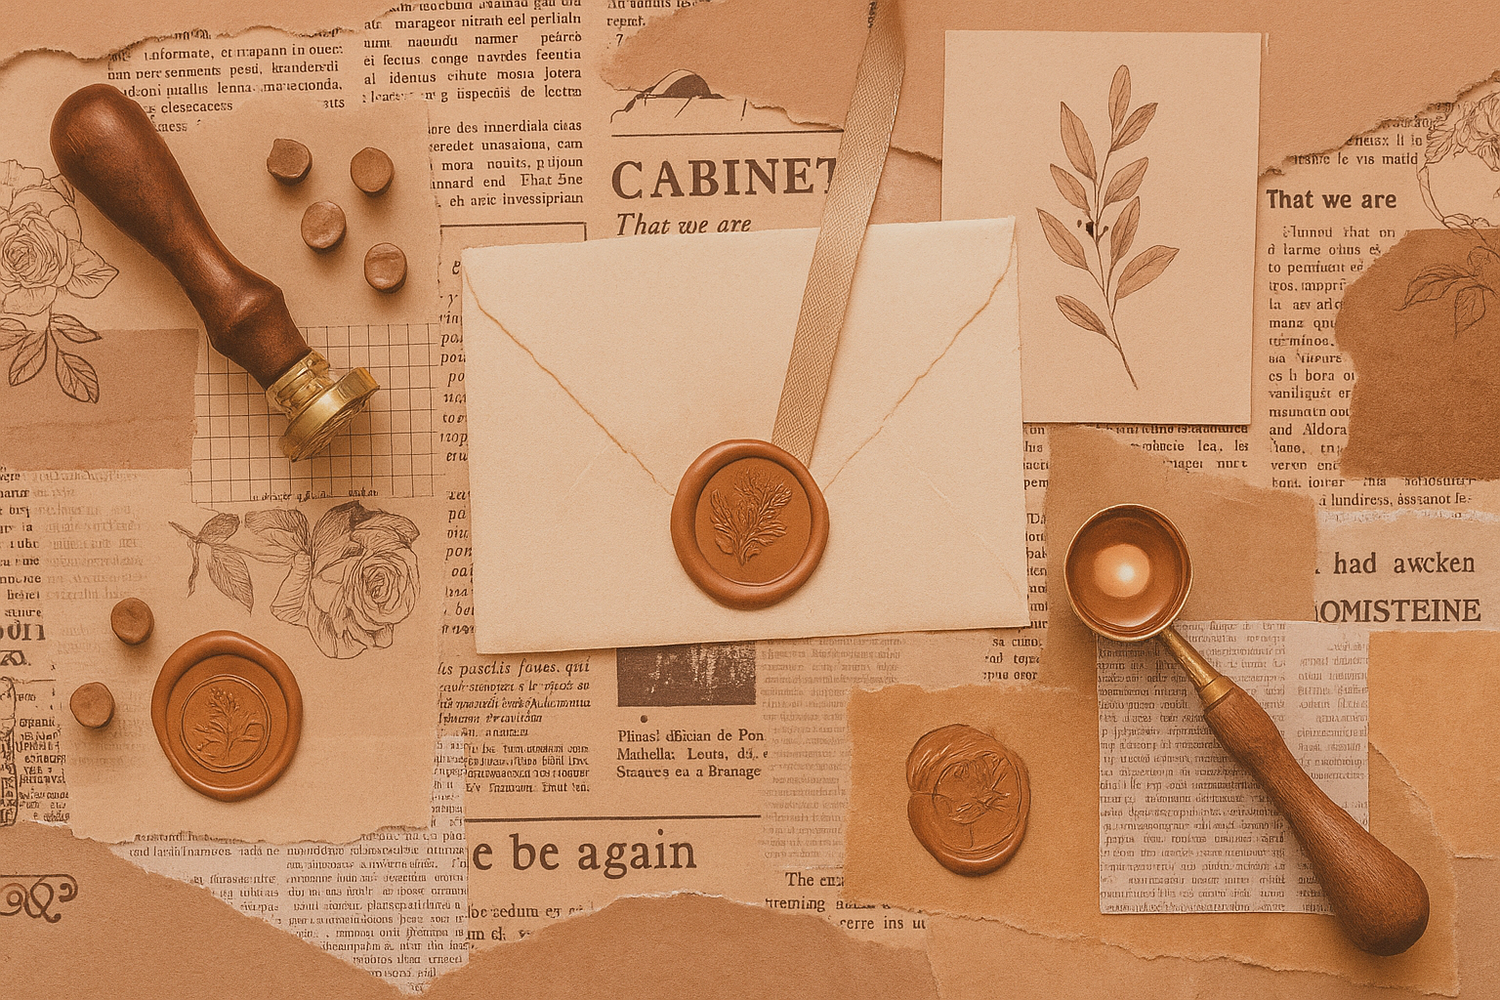
What is Wax Sealing?
Wax sealing involves melting specialized wax, usually colored, into a seal that can then be stamped with a unique design or emblem. Traditionally used to seal letters in the past, these charming seals can now add an elegant touch to your scrapbook pages. The tactile quality of wax seals enhances the visual appeal while bringing texture and dimension to your projects.
Benefits of Wax Sealing in Scrapbooking
1. Aesthetic Appeal
Wax seals add a beautiful visual element to scrapbook pages. They can be tailored to fit various themes, colors, and styles, allowing you to personalize your creations. Whether you choose classic red wax or vibrant hues, the glossy appearance of the seal transforms your scrapbook into a work of art.
2. Durability
Wax seals are not only decorative but also durable. They can withstand the test of time and remain intact in your scrapbook, ensuring your memories stay beautifully preserved. Unlike stickers or tape that may peel or fade over time, wax seals provide longevity.
3. Customization
Creating homemade wax seals allows for complete customization. You can use various stamps—letters, symbols, or even your initials—to create a unique emblem. This makes your scrapbook pages even more special, especially when paired with motifs that resonate with your memories.
Gathering Your Supplies
Before diving into the creative process, you’ll need to gather a few essential supplies to incorporate wax sealing into your scrapbook effectively:
- Wax sticks or beads
- A wax seal stamp (with your chosen design)
- A lighter or heat source
- A small spoon or melting pot (for melting the wax)
- Your scrapbook and chosen pages
The Process of Wax Sealing
Step-by-Step Guide to Wax Sealing
Follow these simple steps to add beautiful wax seals to your scrapbook:
Step 1: Prepare Your Workspace
Start by preparing a clean, flat workspace where you can safely melt the wax without risk of spills or fire hazards. Lay down newspaper or a silicone mat to catch any drips.
Step 2: Heat the Wax
If you're using wax sticks, cut off a piece about the size of a quarter. For wax beads, fill the spoon or melting pot with the wax. Using your lighter or heat source, carefully heat the wax until it melts into a puddle. Be cautious not to overheat it—just enough to melt smoothly.
Step 3: Pour the Wax
Once melted, allow the wax to cool slightly, then pour it onto the page where you’d like the seal. Aim for a size that can accommodate the stamp you’ll be using, usually a round area approximately an inch in diameter.

Step 4: Stamp the Wax
Quickly press your seal stamp into the molten wax. Apply even pressure but don’t press too hard to avoid unintended designs. After holding it for a few seconds, carefully lift the stamp away to reveal your wax seal. The result should be a crisply designed emblem embedded in the wax.
Step 5: Let It Cure
Allow the wax seal to cool completely and harden. This shouldn’t take long, but if your workspace is warmer, it may take a bit extra. Once cured, you can handle it safely and continue working on your project.
Creative Ways to Use Wax Seals in Your Scrapbook
Here are some fresh ideas on how to creatively integrate wax seals into your scrapbooks:
- As Closure for Envelopes: If you’re including hidden letters or mementos within your scrapbook, use a wax seal to keep the envelope sealed and add a touch of elegance.
- Page Decoration: Incorporate wax seals as decorative elements on corners or borders of scrapbook pages, complementing your overall design.
- Layering with Other Materials: Combine wax seals with dried flowers, glitter, or ribbons for added texture and depth in your layouts.
- Themed Seals: Use themed wax seals that match the occasion or mood of your scrapbook, such as hearts for a romantic theme, anchors for adventure, or vintage symbols for a rustic look.
Wax Sealing Techniques for Enhancing Your Leather Notebook Scrapbook
If you’re using a leather notebook as your scrapbook, there are additional considerations for using wax seals effectively:
Choosing the Right Pages
Ensure that the pages in your leather notebook are thick enough to support the wax without tearing or damaging them. This is particularly important when layering multiple materials or when using a heavier wax.
Affixing the Seals
When sealing right onto leather pages, it’s essential to allow extra drying time, as the leather will absorb heat faster than standard paper. Always perform a small test on a separate piece to check how the leather interacts with the wax.
Integration with Other Techniques
A leather notebook also lends itself well to other techniques like stitching or distressing, which can further enhance the wax seals by creating a cohesive theme throughout your scrapbook pages.
Wax Seal Inspirations for Your Next Scrapbook Project
To spark your creativity, consider these inspiration themes where wax seals can shine:
- Travel Diary: Use stamps with globes or compass designs alongside wax seals to reflect your travels.
- Wedding Memories: Incorporate elegant and romantic wax seals to commemorate your special day, perhaps sealing invitations or RSVP envelopes.
- Family Recipes: Add delicious-looking wax seals to enhance the charm of your family recipes pages with culinary-themed stamps.
- Seasonal Themes: Use seasonal colors and designs for holidays, creating a unique scrapbook for each time of year.
Key Takeaways for Successful Scrapbooking with Wax Seals
Incorporating wax sealing into your scrapbook projects can drastically elevate the overall presentation and creativity of your work. Here are the key points to remember:
- Gather all your supplies before starting your wax sealing journey.
- Choose colors and designs that reflect the theme of your scrapbook.
- Practice and experiment with different seals and placements to find what works best for you.
- Embrace the artistic nature of scrapbooking by layering materials and including diverse elements.
Lastly, never hesitate to draw inspiration from existing works or other artists around you. The beauty of scrapbooking is that it’s an inherently personal endeavor; your style and method will shine through.
Craft Your Story with Elegance
By incorporating wax sealing into your scrapbook, you’re not only elevating the aesthetics of your work but also adding a unique and personal touch to each memory captured. Whether you’re sealing your favorite moments in a leather notebook or a standard paper scrapbook, this timeless technique enhances the entire experience of memory preservation. Dive in, experiment, and let your creativity flow. Your scrapbook is ready to speak volumes, and those wax seals are just the cherry on top!

